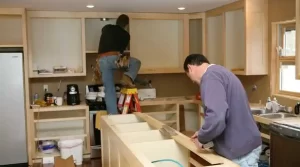
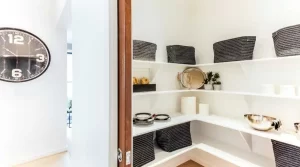
Every kitchen remodeling project starts with a packing and purging celebration as you set up your temporary cooking area. Our constant advice to our clients is to use this time to carefully consider each item in your kitchen and only keep what you genuinely love and need! As a result of our personal experience, it’s ideal to go through and organize your kitchen as soon as the remodeling process begins. Our preferred method is to remove each and every item from your cupboards and drawers and assess its value before deciding whether to keep it. Yeah, it takes a lot of work, and it might be intimidating, but it is so, so worth it. For more information.
After getting that done, it’s time to get ready for your remodel and pack your things.
1. Choose a location for your makeshift kitchen.
It’s crucial for our clients to have a modest space set up to act as a temporary “kitchen” space because many of them stay at home while having their kitchens remodeled. We are more than happy to assist you in locating a location in your house that is appropriate for this, as every home (and family needs) are unique. A second bathroom with a prep space nearby can also be used in place of a laundry room if necessary.
2. Put aside whatever you’ll need for the renovation.
The necessities should stay outside, though! We advise having a coffee machine, a toaster oven, and a microwave, as well as one set of crockery, cups, and utensils for each person living in your home. Prepare ahead of time for any meals you know you’ll be preparing at home while you’re remodeling. You can cut back on takeaway costs by doing any necessary food preparation beforehand.
Considering that you will be handwashing every item you use, keep things basic. Consider using recyclable or biodegradable disposals if you want to avoid the hassle of dishwashing. It’s also a wonderful opportunity to finish off your mismatched party dishes, cups, and napkins from earlier gatherings.
3. Prepare your kitchen belongings for storage while the house is being built.
Packing your unnecessary items is best done with small and medium-sized boxes, packing paper, and bubble wrap. Your belongings remain organized, sanitized, and protected as you pack! Keep in mind to identify your boxes so that when everything is finished, you can quickly set up your kitchen.
4. It’s time to purge.
It’s crucial for our clients to have a modest space set up to act as a temporary “kitchen” space because many of them stay at home while having their kitchens remodeled. No doubt, we’ll be able to assist you in locating a space in your house that’s appropriate for this.
We suggest packing up each category separately to keep you more organized. Go through your cabinets and drawers for objects that match to discover what you have. Donate the things you’ve collected but never used. If you don’t utilize them, there’s no reason to keep them! For cleaning out each category, consider the following advice:
Put any tableware sets you don’t use or adore in the trash. Take pictures of them as soon as possible if you plan to sell them. Check the set(s) you intend to keep for cracks and chips before discarding them. Your food could be contaminated by harmful microorganisms if the glazing is cracked or chipped (if not sanitized properly).
Serving utensils and entertaining utensils are frequently large and difficult to store objects. Identify the superfluous items that don’t fit your hosting style and remove them from your entertainment.
Mugs & Promotional Cups: As they frequently have sentimental significance, these are surprisingly tough to get rid of. To see everything at once, remove everything from the cabinets. Choose which objects you want to keep and why. If you have a collection of mugs, it could be a good idea to store them elsewhere in the house or to include a showcase area when remodeling your kitchen.
The speed with which our Tupperware drawer overflows never ceases to astonish me! Prior to throwing anything out or donating it, I always start by figuring out which containers need matching lids.
Do all of your electronics and small appliances fit into your lifestyle and your needs? As much as possible, try to focus on whether the item is valuable to you right now rather than whether it might be useful in the future. By doing so, you can determine whether you actually appreciate the concept as opposed to just considering using it. Any appliances that aren’t used should be donated.
Extras: Reduce the number of things you’ve been storing that are surplus, and discard anything that has outlived its usefulness (think warped spatulas, peelings nonstick pans, etc.).
5. Think twice before keeping something.
Think about your existing way of life and what you may look forward to in the near future if you’re having trouble determining what to leave with. You’ll be glad you spent the time to get rid of superfluous stuff before the redesign is finished and it’s time to move into your new kitchen. The amount of packing, storing, and unpacking is reduced. Check this blog.
What got you through your kitchen remodel is what we want to know. Post in the comments if you would. We hope these suggestions will inspire you as you plan your upcoming kitchen renovation. For an appointment, contact our team if you’re still seeking a contractor. You want to know how to get ready for a bathroom remodel. We’ve got you covered!


